Tuesday, June 24, 2008

Create a Mirror Image


This will be easy and painless. It works in ALL versions of Photoshop and Photoshop Elements:
1. Open the picture which you have
2. Duplicate -> a copy of the layer you wish to mirror
3. Flip -> Select Menu Edit > Transform > Flip Horizontal and your image will flip to mirror the original image
4. Select Menu: Image > Canvas Size and then set the WIDTH to double the file size, then click the 'Map' below to position the newly added space in the right direction
5. Finish the Creation - Now just use the Move tool and move the images to mirror position. Touch up the edges, using the Smudge tool, Clone tool or any of the others, and that's all there is to it.
Wednesday, June 18, 2008

Engraving At Wood

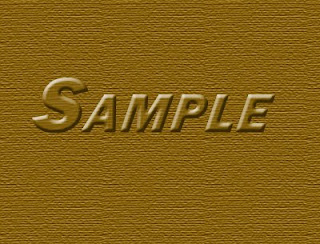
The first thing we think about in such a scenario is the old-fashioned tradition of carving your girlfriend's name, or your initials into a tree. This technique is fine for the effect, however for buttons at a web site, they would be much more legible if you simply nail sign boards to the tree. Tilt and cock them to look home made, and even have a bent nail here and there to drive home the concept.With the digital technological progress, process of photo engraving looking like wood even also earn the us make only in minute calculation.

Following making its step :

1. First, open a new file with the dimensions 300 x 300 pixels with resolution 72 pixel/inch.

2. Now,set the foreground with the wood colour, then give the colour by using brush tool at toolbox.

3. Now, go to Filter > Texture > Texturizer. Set (scaling =100% ; relief=5).

4. Now, create a words using Type Tool at Toolbox.

5. Enter the menu Layer > Layer Style > Color Overlay. Giving wood colour.

6. Next, enter the Bevel and Emboss. Choose contour and texture with wood pattern.

All the other settings, depend on the size of the type and the finished art desired.

Monday, June 16, 2008

3D Style Text Effect


Its process is true modestly, but 3D Style Text Effect will yield the interesting appearance at our photo.
Following making its step :
1. First, open a new file with the dimensions 300 x 300 pixels with resolution 72 pixel/inch.
2. Now type some text with your Pen Tool, use 60pt, color black, the front is your choice.
3. Click menu Select > Load Selection (Choose Layer Transparency)
4. Click Layer > Flatten Image and then Select > Inverse.
5. Now, go to Filter > Pixelate > Crystallize (cell size 5) and then Select > Inverse.
6. Next , go to Filter > Blur > Gaussian Blur (Radius 2.0)
7. Next , go to Image > Adjust > Curve and then press to crtl+D to deselect.
8. Now , go to Image > Adjust > Invert and then Image > Rotate Canvas > 90° CW.
9. Next , go to Filter > Stylize > Wind (method : wind direction ; From the right)
10. Next , go to Image > Rotate Canvas > 90° CCW.
11. Then go to Image > Adjust > Hue / Saturation, click colorize (according to desire).

Water Effect

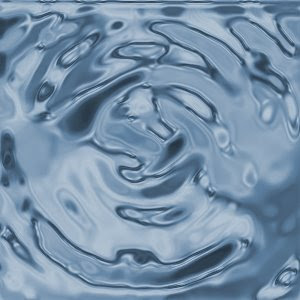
A picture will not see to draw otherwise given a effect touch. With many application software like now it is of course will water down our creation picture. Now in its tenth release Photoshop is undoubtedly the King of photo-editing software and, considering the host of new and revamped features included in the CS3 version of the program, its position at the top of the heap is assured. So this of give a our which can effect make with the application Photoshop that is " Water Effect"
Following making its step :
1. First, open a new file with the dimensions 300 x 300 pixels and reset your colors (D) then go to Filter > Render > Clouds.
2. Next, go to Filter > Blur > Radial Blur and use the settings Amount = 50, Method = Spin, Quality = Best.
3. Now, go to Filter > Sketch > Bas Relief and use the settings: Detail = 15, Smoothness = 12.
4. Now it's time to make it look like water using the chrome effect so go to Filter > Sketch > Chrome and use these settings: Detail = 8, Smoothness = 4.
5. Finally, we just need to add some color so press Ctrl+U to go to the Hue Ajustment Settings and change the settings to: Colorize, Hue = 205, Saturation = 25, Lightness = 0.

Friday, June 13, 2008

What's Curve??

Curves is an advanced tonal control that is a favorite with experienced users and offers the most accurate contrast, color and brightness adjustments of any Photoshop feature. Its dialog has a graph with vertical and horizontal scales representing input and output brightness. When you first open this you’ll see a straight line running through the graph at 45° from the bottom left to the top right. The bottom left represents the shadow area, top right is highlights and the midpoint is midtones. You can drag the line by clicking on it and holding down as you move the mouse. Moving the midpoint up has a lightening effect and down darkens the image. Use the Eyedropper tool and click anywhere on the image and its Brightness value will appear as a point on the line. You can then move this point up or down to darken or lighten that part of the image. The picture will

Look natural, providing you create either a straight line or an arc. The best results are usually achieved with a very shallow shaped curve, and is the reason why it’s called Curves. This Curve is made by pushing the curve in a slight downward direction of the 3/4 shadow areas and a slight upward movement of the first quarter highlight areas, creating a very gentle shape. This gives a boost to contrast without clipping shadow or highlight detail that could occur when Levels or Brightness/ Contrast is used.

Why We Need Photoshop??

Photoshop is an advanced picture – editing program. Sometime we an annoyed with the less gratifying photo result that goodness result of photo by using camera of and also manual digital camera, so that we lose the time and expense of. But now with the existence of Adobe Photoshop representing one of the our which can program use for the editing photo. By Photoshop we can beautify the photo which we wish by enhancing some of effect and decoration in the photo.