Saturday, November 29, 2008

Making Colored Effect

Step1
Firstly we need to create a new file (File>New), having 1280x1024 px and 72 dpi. Select after that the Paint Bucket Tool (G) to fill the new file with black color. Then, write the date of the New Year with separate ciphers, applying the Horizontal Type Tool (T).



Step2
The text needs to be edited as the next example shows it:
Each layer needs to have the Opacity of 80%.
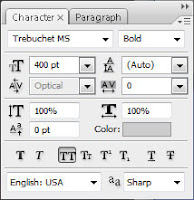


Set for the first cipher 2 the next
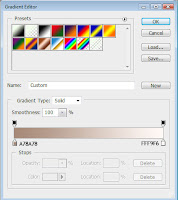
Blending Options>Gradient Overlay by making a mouse click on this layer on the layers' palette. Then, set the next demonstrated gradient



It's the result we'll get:



Saturday, November 15, 2008

Make Icon "on"

Step 1
Create a 40x40 pixel image, then create a new layer by going to Layer -> New -> Layer. Take your Elliptical Marquee tool (you can press M to select it) and make a circle selection somewhat smaller then the entire image. Make your foreground color some bright green, example #86EE21. Choose your Gradient Tool and change its setting to "Radial Gradient"


Step2:
Now right click your layer with your image on it and go to "Blending Options", then add these settings


Once done, now we will get to the logo in the middle, start by creating a new layer and go to your Elliptical Marquee tool. Then make a selection that is a bit smaller then the image you made and center it up. Then change your Elliptical tool settings to "Subtract from Selection" and make a selection in the middle of the circle you already created but a bit smaller


Step3:
Now merge the two layers with images on them by clicking the top layer and go to Layer -> Merge Down. Your image should now look like this: