Tuesday, December 30, 2008

Make Magic Shine

Step 1
Create a new document 400 x 300px and fill it will black.
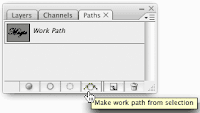
Type the text in "Edwardian Script ITC", font-size 160 pt. Then, Go to the path palette and press the Make work path from selection button.


Step 2
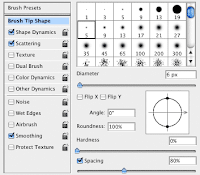
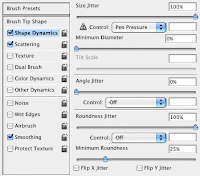
Now the text is a path it is posible to stroke it with the brush. But before that you need to change the brush options.


Step 3
Now the brush is ready to stroke the text. Go to the layer palette and delete text layer or make it invisible. Make a new layer. Set white as the foreground color. Go to the path palette and right click om the Work Path and choose Stroke path. In the window that now appears choose for Brush and make sure Simulate pressure is not checked. The stroke is a little to hard to make this better: Change in the brushes palette the following options: Brush Tip Size: Diameter to 4px and Spacing to 130%. Scattering: Scatter 600% Stroke the path again but this time with the option Simulate pressure checked. Click in the palette path on an empty area. That way the path becomes inactive.


Step 4
Go to the layer palette and double click on the layer miniature of the sparkles layer to open the layer style window. Go to Drop Shadow and change the values as shown below:

Monday, December 15, 2008

Chocolate Style Effect

Step1
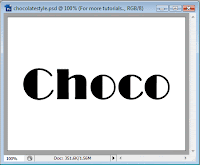
We start with a blank 400x300px canvas, and insert text:


Step2
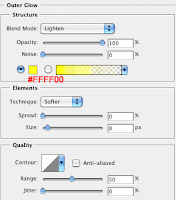
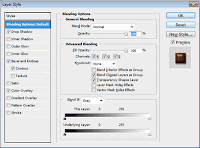
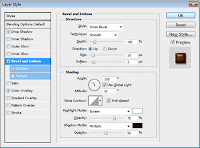
Now, we are going to add a Drop Shadow, then add the following styles:


Step3

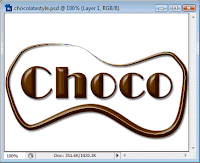
Next, we will create a chocolate icing-type border to the text. Select the Pen tool and draw a border.


Then go to the Paths Window (Window > Paths), and choose the Brush tool. Choose a size that you want the border thickness to be, then right-click the Path we just created (in the Paths Window) and choose Stroke Path. You can try both the Simulate Pressure checked and unchecked, see which you prefer.

Saturday, November 29, 2008

Making Colored Effect

Step1
Firstly we need to create a new file (File>New), having 1280x1024 px and 72 dpi. Select after that the Paint Bucket Tool (G) to fill the new file with black color. Then, write the date of the New Year with separate ciphers, applying the Horizontal Type Tool (T).


Step2
The text needs to be edited as the next example shows it:
Each layer needs to have the Opacity of 80%.


Set for the first cipher 2 the next
Blending Options>Gradient Overlay by making a mouse click on this layer on the layers' palette. Then, set the next demonstrated gradient


It's the result we'll get:


Saturday, November 15, 2008

Make Icon "on"

Step 1
Create a 40x40 pixel image, then create a new layer by going to Layer -> New -> Layer. Take your Elliptical Marquee tool (you can press M to select it) and make a circle selection somewhat smaller then the entire image. Make your foreground color some bright green, example #86EE21. Choose your Gradient Tool and change its setting to "Radial Gradient"


Step2:
Now right click your layer with your image on it and go to "Blending Options", then add these settings


Once done, now we will get to the logo in the middle, start by creating a new layer and go to your Elliptical Marquee tool. Then make a selection that is a bit smaller then the image you made and center it up. Then change your Elliptical tool settings to "Subtract from Selection" and make a selection in the middle of the circle you already created but a bit smaller


Step3:
Now merge the two layers with images on them by clicking the top layer and go to Layer -> Merge Down. Your image should now look like this:

Wednesday, October 29, 2008

Blue-Orb Effect

Step 1

Open up a new document with 300×250 pixels, transparent background. Fill the background up with black, #000000. We’ll be starting off with the orb base color next, from darkest blue to white. Click on the foreground color and replace the current color to #000066. Create a new layer named “Orb Base” and select the brush tool.


Select a brighter blue, #3399ff for the foreground color and click your mouse once on top of the previous 2 base colors.Adjust the diameter by right clicking on your canvas and turn the hardness all the way down to 0%. We’ll be using 120 pixels for the master diamter in this tutorial. Go ahead and left click the mouse once on the canvas.
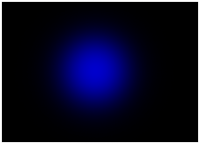


Click on your forgound color and select a lighter blue, #0000cc using the color picker. Tune down the master diameter a little bit smaller. Click your mouse once on top of the previous base color.

Select a much brighter blue, #99ccff for the foreground color using the color picker and click your mouse once again on top of the previous 3 base colors.
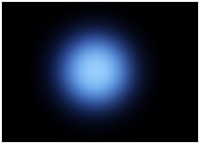


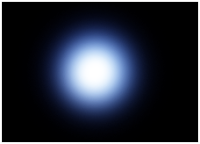
Click on your forgound color and select white, #ffffff. Tune down the master diameter a little bit smaller and click your mouse once on top of all the previous base color. The following result is shown with the optional step added in.


Step 2

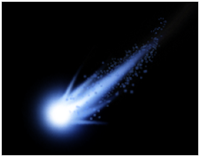
Select the smudge tool and turn your master diameter up to around 39 pixels for this tutorial.


The next step require some practice supposedly this is your first time using the smudge tool. Click and hold the left button inside the orb base colors while moving your mouse to drag out the tail.Then,click and hold the left button on the inner tail while dragging your mouse to increase the length of the tail. Repeat and play around until you get the desired tail.Good Luck^^

Monday, October 20, 2008

make image-drop-shadow

Step1
Take a new file of 400 pixels,400 pixels, of resolution 72 dpi in the RGB mode.
Take the Shape Tool select this one. Then Create a new layer make the selection fill with Black color.


Step2
Go to Blending Option use the following settings.
Step3 Your image should be look like this.Then copy of the shape layer and Press Ctrl+T Transform Selection to Rotate your shape.

Monday, October 6, 2008

Creating Swirls Effect

step1
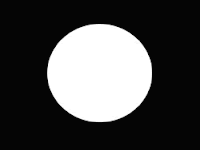
Create a new canvas. On a new layer, use the to make a circle and fill it with white.
Hold the CTRL Key and click on the Circle Layer. Then choose Select > Modify > Contract. Choose 20 pixels and delete the inside.


step2
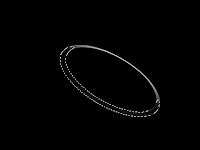
Next, distort the ring by choosing Edit > Transform > Distort. It doesn't have to look exactly like the one shown at the left.

Then, Hold the CTRL Key and click on the Ring (Circle) layer. Choose Select > Modify > Contract and choose 1 pixel. After which, Choose Select > Modify > Feather and choose 10 pixels.


step3
Next it to Delete the selected area. Simply press the Delete key twice.


step4
duplicate the ring layer several times and simply varying it by scaling, rotating, adding a few filters (like blurs) and changing the opacities of each duplicate.
next, merge all the ring layers. Then used the gradient tool

Wednesday, September 24, 2008

Step1

First, create a new image, 400x400 pixels and fill the background with the color that you like.

Use Type Tool [T] to create text that you want to make look like metal. For the best result use large text, e.g. size 75+.

The color of the text does not matter so fill it with any random color.


Step2

Now is the time to add Inner Bevel to your shape. Right click on the text layer and select Blending Options...

Layer Style window will open, select the settings that you see on the screenshot.


Step3

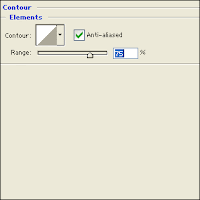
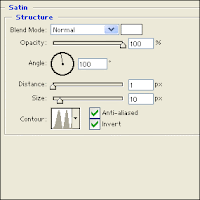
In the Layer Style window select Contour, Satin, Gradient Overlay on the left and use settings that you see on the screenshot.


Step4

Press ok when you done and your image should look like mine.

Congratulations, you now know how to create metal text in Photoshop.